As the price of property continues to rise, it has become paramount to seek clever ways of finding room for our stuff. An increasingly popular solution is transforming shipping containers into storage units. These solid and sizeable boxes have shown themselves to be super practical for a variety of storage needs. And with a few smart strategies, you can effectively turn them into tailor-made storage solutions for your unique needs.
In this guide, we will be delving into a healthy mix of insider tips and savvy tricks to make the most out of your shipping container storage. From pinpointing exactly what size and model will serve you best, to the nitty-gritty of sorting out your delivery logistics and preparing the area for your container – we’re here to walk you through the whole process.
So, let’s dive right in!
Advantages of Using Shipping Containers for Storage
Think about it – what’s the first thing that comes to mind when you think of storage? Probably not shipping containers. But here’s the surprise – these behemoth boxes, usually spotted piled high on cargo ships, actually make a killer storage solution. Here’s why:
- They’re Super Tough: Ever seen a shipping container handle the high seas? These things are built to withstand just about anything. Extreme weather, harsh travel conditions – you name it. This means they’re gonna last you a long, long time as a static storage solution, come rain or shine.
- They’re Safe as Houses: Here’s a biggie – shipping containers come ready-made with some serious security features. We’re talking corten steel walls and lockable double doors for starters. You can even add a lock box if you want to up the anti-theft game. Simply put, your stuff is super safe inside.
- Friendly to Your Wallet: With all this security and durability, you’d expect a hefty price tag, right? Well, you’re in for a treat. Shipping containers are really cost-effective. They require barely any maintenance and give you some serious return on your investment (especially if you opt for a second-hand one). It’s high time you added “budget-friendly” to your storage solution checklist.
- They’re Basically Nomads: Another cool feature of shipping containers? They love to travel. Designed to be transported, they’re flexible and follow wherever your storage needs take you. Got to move? No worries, your storage can tag along!
- They’re Green Machines: Repurposing a shipping container as storage is an eco-friendly move. You’re basically recycling a giant steel box that would otherwise be wasting away. Help the planet, reduce your carbon footprint, and get a fabulous storage space – win, win, win.
- They Laugh in the Face of Bad Weather: Remember when we said these containers could take on the high seas? That means they’re absolutely windproof and waterproof. They don’t suffer from leaks or drafts like wooden sheds or regular warehouses might. You get peace of mind knowing your stuff is dry and safe all year round.
- They’re Low Maintenance: Shipping containers don’t demand much. Unlike a wooden shed that could rot or a metal building that might rust, these just need a quick once-over now and again. A simple visual check for any significant wear or damage is usually all it takes. You’ll save a bunch of time – and who couldn’t do with more of that?
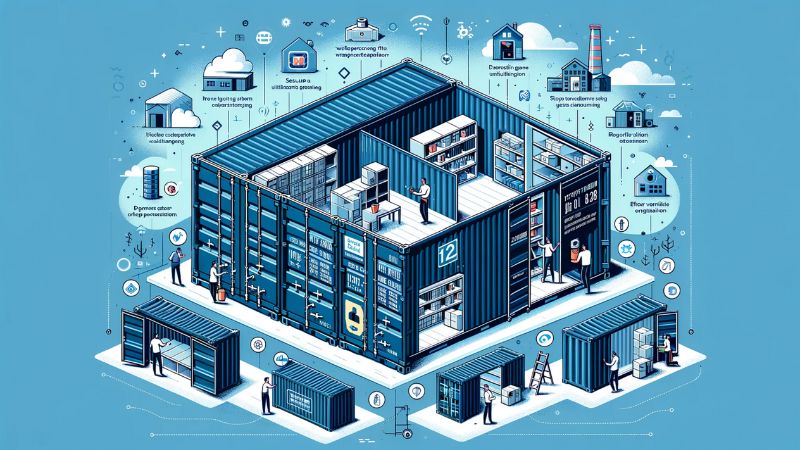
20 Important Tips for Using Shipping Containers as Storage Units
We’ve bundled up 20 way-too-awesome tips from the experts to guide you through this process. We’re talking about everything from picking the right size to pondering on buy-or-rent decisions, and what sort of tweaks you might want to consider. As you scroll down, you’ll gain a better understanding of how to make your shipping container storage vision a reality. So, let’s get started and delve deeper into the exciting realm of shipping container storage.
For an optimized shipping container storage setup, keep in mind these 20 critical tips.
#1. Choose the Right Size Container
The first major decision you’ll need to make is size. Sizes usually swing between 20 to 45 feet, but don’t let that overwhelm you. Take a chill moment and map out what you’re aiming to store. Consider things like how big they are, how many items there are, and their shape.
And hey, don’t just think about now – remember to plan a bit for the future too. You definitely don’t want to run out of space in a few months’ time.
A pro tip? Go slightly bigger than you think you’ll need. It’s way better to have some extra room than to be squeezed for space. And if you’re still stuck, don’t sweat it. The suppliers you’re talking to will have tons of experience and can give you some solid advice on the best fit.
#2. Buy vs Rent
When it’s time to decide whether you’re buying or renting a shipping container for storage, it’s a pretty big deal. Each option has its perks and its drawbacks, so let’s dive right in and see what’s what.
| Head-on into buying a Container | Riding the rental wave | |
|---|---|---|
| Upsides | One-time payment can save you a bundle over time. Complete control over tweaks and modifications- it’s yours, after all. No annoying monthly reminders or ticking time clocks. | No hefty initial pinch on your pocket. Hand over the keys when you’re done with it. Usually comes with repair and swap services baked right in. |
| Downsides | Requires a bigger upfront cash pile. Maintenance and repairs are on your dime and time. Tricky to shift or ditch if it becomes a white elephant. | Continuous monthly payments can sneak up on you. Hands are tied when it comes to big-changes in the container. Most rentals come with an impending ‘return by’ date. |
Whether you’re on team buy or team rent, make sure you do a quick run of the numbers based on your storage needs, how long you’ll need it and how much dough you’re working with. It’s all about making a choice that fits your story best.
#3. Used vs New Containers

So, using a shipping container for storage is a great idea. But you’ve hit a fork in the road – do you go for a shiny, brand-new container, or save some cash with a second-hand one? Here, let me break down the pros of each option to help you along.
| New Containers | Used Containers |
|---|---|
| You’re the first owner – no scuffs, scratches, or dents | Easier on the wallet – not as pricey as new ones |
| Built to last – they have many good years ahead | Ready to go – often in stock and ready for quick dispatch |
| Easier to custom-fit – if you have unique storage needs, new ones can be better to work with | Perfect for temporary use – if you need it for short-term storage, a used container is a smart choice |
| Hassle-free – you’re less likely to have to deal with repairs anytime soon | Tried and true – they’ve already done their time in tough conditions |
To put it simply, the best choice all depends on what you need the container for and how much you’re willing to drop on it. Both options have their own plus sides, so it’s about figuring out which aligns best with your specific needs and budget. Happy choosing!
#4. Compare Multiple Quotes From Suppliers
When it comes to picking a supplier, you can’t just run with the first one that comes along. You’ve got to play the field, check out a few different options, and compare their quotes. Price is key of course, but there’s also value for money to consider. It’s not just about the container, but verifying what’s also included in the deal like delivery, services, etc., to really understand what you’ll get for your buck.
Let’s break it down:
- Price Matters: Get different quotes and stack them on top of each other. The cheapest might catch your eye, but make sure you’re getting quality, not just a bargain-basement container.
- Services Included: Peek into the little extras every supplier offers. Some may ship it to your doorstep and even fetch it when you’re done. There might be after-sales services, so keep your eyes peeled for those perks when you’re measuring up quotes.
- Small Print: Go on a treasure hunt to unearth the supplier’s terms of service. There could be hidden costs or special charges stashed away. Check out deposit rules and refund policies to sidestep any unexpected “surprises” further on down the road.
- Reviews & Feedback: Have a nose around for customer reviews. They are like little snippets of wisdom served up from people who’ve waltzed this dance before. This will clue you in on the supplier’s trustworthiness and reputation.
You see, it’s not all about grabbing the cheapest price tag – it’s a tad more nuanced. Price, quality, and customer service – these are the ingredients you need to brew up the value recipe you’re after. So, juggle your quotes, examine them like a pro, and don’t be afraid to make an educated pick.
#5. Figure Out Delivery Logistics
Sorting out the delivery details is a crucial first step. Start by getting in touch with your supplier. They will be the best guide in defining the delivery details, ensuring that any possible hiccups are addressed before they become big issues.
Here are the key things you should consider:
- Transport: Does the supplier provide a truck to get the container to you, or do you need to sort this out yourself? If the latter, you’ll need a truck that can handle the container’s load without breaking a sweat.
- Where to place it: Figure out the perfect spot for your container on your property. This spot must be accessible for a truck and large enough to fit the container comfortably. Also, make sure the ground is flat and sturdy enough to bear the weight of the container.
- Gear: The offloading and placement of the container might need certain special equipment, such as a crane or forklift. Find out if the suppliers have got you covered on this or if you need to arrange it on your end.
- Paperwork: Depending on where you live, there could be regulations about placing shipping containers, especially in residential areas. It’s a good idea to ring up your local council or city hall to check if you need any permits.
“Getting the delivery organized ensures you avoid needless headaches, saves you time and ensures your container drops precisely where you want it.”
#6. Prepare the Ground Properly
Before your shipping container gets to you, you’ve got to ensure that the area where it will stay is ready for it. A perfect spot for your container is somewhere stable, free from moisture damage, and unlikely to settle unevenly. Here’s the scoop:
Pick the Right Materials: This could be things like a concrete pad, crushed stone, or specifically-designed blocks that can handle all the weight your fully-stocked container can throw at them. Each option has its perks, and the best one for you really depends on the type of soil where your container will rest and what you want to use the container for.
- Crushed Stone: Many people go for a bed of crushed stone when storing a container. It’s excellent for draining away water, stopping it from piling up and letting air flow through freely.
- Concrete Pad: If your container will see heavy use or if you’re storing very heavy items, a concrete pad could be a more secure platform. It lasts a long time and, because it’s a solid block, can stop unwelcome visitors, like rodents, from settling in underneath your container.
- Blocks: Blocks, positioned at the corners of the container, can also do the job well. This strategy ensures that the doors operate correctly, because the container stays flat and level, and it allows air to flow beneath the container, which is always a good thing.
Just remember that, as in all things, detailed planning and checking in regularly can sidestep future problems, like uneven settlement or water damage, making sure that your stored items have a secure and safe place to stay.
#7. Level the Container
Getting your shipping container on the straight and narrow is kinda crucial. Just think about it – if it’s all wonky and not sitting properly, it’s going to put a lot more pressure on some parts than on others. And what’s going to happen? It’s going to twist out of shape, and your doors won’t shut right and your floor’s going to be uneven. Not what you want, right?
“Getting your container level from the get-go is the solution to warding off a whole heap of problems later, from messed-up doors to a skewed structure.”
So here’s the how-to—
- First off, you need to check out the spot where you want to put your container. Is it level? Might be worth getting your spirit level out, just to be sure.
- Then you need to pull together some wooden shims or concrete blocks. You’ll use these to adjust the height of the container at certain points, so it’s not tipping one way or the other. You want it perfectly horizontal.
- Something else to bear in mind – you might need to check the level again after a while. Especially if the container’s not on a permanent site and there’s stuff like soil erosion going on.
Taking a little bit of time to get the leveling right at the start is gonna save you from a load of issues down the line. Plus, your container will be fighting fit for longer!
#8. Raise the Container Off the Ground
If you’re keen on extending the life of your shipping containers, it’s a smart move to keep them hoisted off the damp ground. This doesn’t just offer a good airflow beneath the containers, but also keeps a check on moisture accumulation, nipping the threat of rust in the bud.
So how do you lift your containers? Let’s look at a handful of options:
- Concrete blocks: Positioning your container on concrete blocks at each corner strikes a good balance between the need for elevation and stability, particularly on flat surfaces.
- Beam system: This takes a bit more elbow grease, but it offers superior stability and ample height. You lay two sturdy beams parallel to each other and hoist the container on top.
- Concrete pad: Crafting a slightly raised concrete pad for your container can entirely eliminate any chance of ground contact.
Remember, if you plan on filling your container with heavy items, you’re going to need some extra support in the middle to avert any sagging.
#9. Consider Modifications
Let’s be real, a basic shipping container might not exactly meet all your storage needs. However, the cool thing about these steel boxes is their ability to be modified to fit just about every requirement you can think of. So, whether you’re looking to perfect your container’s storage environment or you want to make access to items easier, some thoughtful modifications can make a world of difference.
- Shelving: You might find that stacking items on top of each other just doesn’t cut it. Fear not! By installing shelves, you can organize items in a way that makes sense to you. Elevated storage also means less chance of your stuff taking damage from being on the floor.
- Lighting: If you’re planning to visit your container more often than not, it wouldn’t hurt to have some type of lighting installed. Not only does this help prevent stumbles and falls, but it also helps create a more welcoming space.
- Ventilation: Trust me, good air circulation can be a lifesaver. It stops condensation from building up and causing yucky corrosion or damage to your valuable items. Think about popping in some turbine vents, HVAC systems, or even simple vent cut-outs for that fresh airy feel.
- Power Outlets: Depending on what you’re storing, having some power outlets installed could be really convenient. It’s a smart solution for things like using tools or charging up gadgets.
One thing to remember is that these modifications should ideally be done by a professional. After all, you wouldn’t want to compromise the safety or structural stability of your container. Also, be sure to check your local regulations – you might need to get some permits for certain modifications.
#10. Use Proper Storage Techniques
Getting the most out of your shipping container storage calls for a smart stacking and sorting system. Your space will be optimized, meaning more room to store stuff. Plus, you’ll have no problem locating and reaching your items when you need them.
- Pallets and Shelves: Pallets – they’re the unsung heroes of the storage world. They raise your items off the floor, shielding them from possible water damage during those pesky rainy days. Shelves are just as importante, as they help you use vertical space, making room for more things while keeping it all tidy and easily reachable.
- Bins: Sometimes having a ton of small items can be a bit of a hassle. Keep them neat and organized in large bins, and don’t forget to stick a label on each bin for that instant ‘there it is’ moment.
- Proper Arrangement: Don’t hide the things you use often behind a mountain of stuff. Try to put them closer to the front, for easy access. The less frequently used items can chill out at the back until you need them.
Just keep this in mind: Your end aim is to create a space where everything has its place, is easy to find but not constantly in your way. By doing this, you’ll have a well-organized shipping container space where you can store more, while keeping it tidy and efficient.
#11. Protect Valuable Items
You’re eyeing its solid structure and thinking about the safety of your stuff. Well, you’re on the right track. However, it’s more than just throwing your items in there. Here’s how you can secure those prized possessions:
“Squeezing everything in a space isn’t the be-all and end-all of storages. It’s not just about making everything fit, it’s about keeping them safe. By the way, you arrange and care for your things inside the shipping container, can directly impact their lifespan.”
- Sealed containers: Think about getting those plastic bins with the tight lids for added protection. It’s like your items are dressed for war against dust, dampness, and creepy crawlies.
- Desiccants: You might want to throw in silica gel packs or similar stuff inside your storage boxes. These little helpers can suck in moisture and prevent damage to items that might otherwise turn into a damp mess.
In the grand scheme of things, taking these extra steps to keep your stuff safe in a shipping container will be worth it. So, give these tips a chance. Remember, better safe than sorry!
#12. Check for Leaks
Keeping your storage items in pristine condition is all about consistency, particularly when it comes to checking your shipping container for leaks. Over time, the usual wear and tear might cause small holes or gaps to pop up in the container, and any water that sneaks through these openings can wreak havoc on your items. Regularly inspecting your container for leaks can spare you from any unexpected, costly damages.
- Regular Checks: Make a habit of giving your container a once-over, especially after any intense weather like heavy rain, snow, or a wind storm. Keep an eye out for visible signs of damage like holes, cracks, or gaps.
- Interior Exam: During the day, close up all the container’s doors and windows. If you notice any stray beams of light sneaking in, you’ve found a possible leak.
- Water Hose Test: An easy way to scout for leaks is to spray down the container’s roof and walls with a water hose. Then, go inside and see if you can spot any wet areas.
Keep in mind the old saying, “Prevention is better than cure”. By consistently checking your container for leaks, you’ll safeguard against any unexpected expenses down the line.
If you do come across any leaks, be sure to address them right away. You can find a variety of sealing solutions and repair kits on the market to help with mending minor leaks. If you’re dealing with a big leak or a lot of damage, you might want to look into getting professional help.
#13. Add Locks for Security

Yo, never sleep on the importance of a beefy lock for your shipping container storage! It’s like one of the first things you gotta figure out. There are a ton of different locks available, so take a beat to find the one that suits your vibes the best. Here are a few you could explore:
- Padlocks are pretty much a go-to for most folks. They’re cheap, easy to scoop up, and if you go for the hardcore types, they’re tough to hack through. Perfect if you’re posted in areas where thievery isn’t really a biggie.
- Door handle locks are integrated right into your container’s handle, which makes messing with them a lot trickier. It’s like you’ve got a built-in padlock. Super cool if you’re in an area where sticky fingers are more common.
- For a next-level protection, consider lockboxes. These bad boys are steel boxes welded to your container’s door with just a tiny spot to put in a lock. Almost impossible to tamper with. It’s kinda the go-to for folks storing some seriously valuable stuff.
Now, the lock you choose is important, for sure. But also think about where you’re placing your container and what other security measures you’ve got going. No matter how tough your lock is, it’s just one part of your total security game, remember that!
#14. Insulate the Container
If you’re using a shipping container for storage, insulating it is an absolute must! It’s a fantastic way to help regulate temperature and keep moisture in check. Think about it this way: it’s like a cozy jacket for your storage items. You’ve got a few options for insulation, like spray foam, fiberglass, foam boards, or even the more blanket-style insulation.
The perfect pick for you really depends on what you’re storing, the climate in your area, and your budget. Unless you’re a do-it-yourself wizard, you might want to hire a professional to install it for you. Remember to insulate the walls AND ceiling. Trust me, insulation is a game-changer. It creates a stable environment inside your container and helps protect your stuff from potential damage .
.
#15. Install Shelving
Imagine how much more space you’d have if you added a few shelves to your shipping container. Whether it’s tools, equipment, or simply an overflow of paperwork, shelving gives these items a proper home, making things way easier to find and reducing any chance of things getting lost or damaged. It’s like giving your items a cozy home within your storage container, so you can sleep easy knowing they’re all tucked away nicely.
Pick the kind of shelving that can handle the bulk of your stuff. And, hey, shelves don’t need to be a forever thing. Opt for adjustable or removable shelves, and watch them morph to suit your ever-evolving storage needs. They can be set up at different heights to cater for odd-shaped items and wouldn’t you know it, you’ve just unlocked a whole lot of vertical storage space within your container.
If you’re planning to use the container for the long haul, be sure to secure your shelves firmly to prevent any unexpected shuffle or tumble. Remember, investing in good shelving does more than just creating space—they make your shipping container more organized and accessible. So, don’t skimp on those shelves!
#16. Separate Hazardous Materials
If you’re stashing away hazardous stuff like chemicals, fertilizers, or anything flammable in your shipping storage containers, you’ve got to handle them with extra care. Mixing these bad boys in with your regular storage can stir up trouble. So to steer clear of nasty spills, scary fires, or just plain breaking the law, you’ve got to store them separately and follow certain safety rules.
Ok, so step one in this process is figuring out what you’ve got that’s dangerous. Once you’re clued in on this, you can take the right steps to handling them properly. Each hazardous material needs a strong and sealable container so there are no accidental leaks, and a clear label so everyone knows exactly what’s inside. Trust me, you don’t want to confuse bleach with water!
No one wants a big, explosive build-up of harmful fumes. To avoid this, designate a specific section within your shipping container just for hazardous stuff and make sure it’s well ventilated. It’s also a smart move to have things like spill kits and fire extinguishers handy, just in case things go south. And, lastly, never forget to check out your local laws about how to store dangerous materials. Getting into trouble with the law is definitely not on today’s to-do list!
#17. Ventilate Properly
Having a solid ventilation system is absolutely key if you’re repurposing a shipping container to be your storage go-to. If you don’t take this seriously, you could end up with a moisture and humidity build-up inside your container, which could seriously mess with your stored goods. And guess what? The in-built vents that come with these containers often don’t cut it. Time to flex those creative muscles, my friend.
Adding extra vents can be a game changer, especially if you’re storing stuff that’s sensitive to changes in temperature. Try to get vents on all four sides – this way you optimize cross ventilation. Still spotting condensation inside your container despite putting in a bunch of extra vents? You might want to look into using a moisture absorber or even investing in a solar fan to boost evaporation. Just remember to check on the conditions inside your container often, to make sure everything’s shipshape, pun intended.
#18. Use Good Lighting
Lighting can seriously upgrade your storage container game. It’s not just about making the inside of your container brighter and more comfortable to navigate, but it can also help to keep sneaky thieves at bay. Your main choices here are skylights or electrical lighting.
Skylights bring a bit of Mother Nature inside your container, utilizing daylight to keep things bright without burning a hole in your wallet. Just double-check that they’re sealed up tight to avoid any pesky leaks. One thing to keep in mind, though, skylights can’t help you when the sun’s out of sight.
If you’re a night owl or might need to make midnight trips to your container, electrical lighting is the way to go. Yes, there’s a bit more to it, like wiring and paying for the electricity, but the flexibility is worth it. And don’t forget, anything electrical should be left to the pros – hire a legit electrician to get everything up to code and above board.
Lighting isn’t just about seeing your stuff, it’s also about safety, so make sure to give extra attention to potential accident zones.
#19. Make It Accessible
If you’re planning to use a shipping container for storage, the first thing you’ve got to bear in mind is hassle-free access. After all, you don’t fancy spending your time and energy creating a perfectly organized storage system just to find out that retrieving anything from the container is like going through an obstacle course.
Your number one priority should be the location of your container. Smacked in the middle of a path with frequent foot traffic? Not a great idea. Hidden away, tucked in a corner? Same deal, pal. It’s essential to have fine balance when considering the positioning of your container. Think about the layout of your yard or property to nail that sweet spot for container placement.
Next, you’ve got to plan how to space things out on the inside. Aim to make sure your commonly used items aren’t swamped behind stuff you hardly touch. A simple labeling system, and maybe even having an inventory, can make a world of difference for access and retrieval.
And then, if you’re storing heavy stuff, think about adding ramps for easier loading and unloading. The way you jumble goods inside the container can also affect how easily you access them. So why not try using shelves or platform systems? That way, you can keep your haul organized and within arm’s reach.
#20. Container Fumigation
Yo, gotta keep your storage container bug-free and honestly, container fumigation is the boss at it. Basically, you’re filling up the container with pesticide gasses to tell any pests to take a hike. Just a heads up though, different stuff you’re storing might need different types of fumigation, so make sure you’re using the right stuff to avoid damaging your precious goods.
Okay, so before you go fumigatin’, seal that container up tight. We don’t want any sneaky bugs getting back in. If you’re new to this fumigation thing, you might want to call in the pros just to be safe. They’ll do the job right and keep it all eco-friendly. Once all the bug-zapping is done, air that container out good before you use it. We don’t want any leftover spray messing with your treasures. This way, your container remains a safe and clean place for your stuff.
How to maximize space when using shipping containers for storage
Here are some cool tips to help you work out how to use your container’s space in the best possible way:
- Check out the inside: Start by taking a good look at what’s inside your container. Bear in mind any quirks or features that could reduce the usable storage, such as wheel wells or beams. Factoring them into your storage plans early on is key.
- Map it out: Getting a rough idea of your space by drawing a basic floor plan can do wonders for helping you work out the best way to arrange your stuff. Plus, thinking about any extra items you might get down the line will save you headaches in the future.
- Don’t forget the vertical space: It’s super easy to overlook the height of a shipping container. Adding shelves or piling your stuff higher can be a fab way to take advantage of this space, but don’t forget to secure anything you stack up to stop any mishaps.
- Divide and conquer: Splitting your storage area into different sections or zones can make staying organized a breeze, and finding your stuff again later a whole lot easier.
- Think about your stuff: There’s bound to be items you own that don’t really suit being stacked high or perched tidily on a shelf. Any heavyweight, awkward, or delicate bits might need their own special area so always make sure there’s enough room around these for easy access later.
- Prioritize your items: Anything you’ll nipping into your container more often for should be near the front — it’s a simple step that’ll save you heaps of time in the long run.
Fact is, making the most of your shipping container’s space doesn’t just mean you can fit more stuff in, but makes it safer and easier to navigate too. Messy storage can possibly lead to damaged stuff or even unwanted injuries, so spare some time to get things ordered and keep it neat and tidy – it’ll be worth it promise!
The Bottom Line
And that’s the rundown, folks! Leveraging shipping containers for storage is truly a game-changer. You’re not only getting a sturdy, secure, and budget-friendly storage solution, but you’re also contributing to the environment by repurposing containers. Each of these pointers can help you navigate the process, ensuring you hit a home run. We’re talking about getting the most bang for your buck while effectively storing your stuff – now that’s what we call a win-win. So, go ahead, venture into the wild world of shipping container storage – let’s shake things up!